How to Take Screenshots of Facebook Posts, Remove the Personal Information, and Post them on Reddit
Introduction
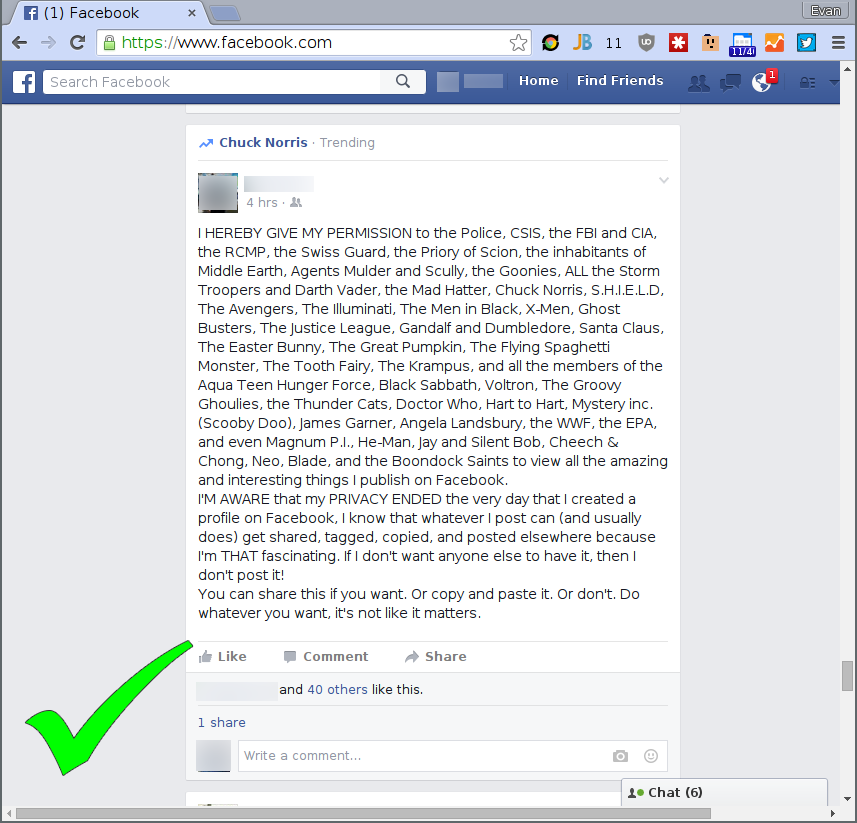
Everybody loves a funny Facebook post. Or Facebook status? What are they called now anyway? In either case, there’s a steady stream of new ones showing up on failblog , /r/facepalm , /r/iamverysmart , and /r/comedeycemetary . So say you found a post on your newsfeed that you think can top the charts: what do you do next?
First you need to take a screenshot of the post. Maybe you already know how to take a screenshot, but what happens if the post is longer than the screen? Then you’ll have to remove all personal information and colorize the names. This is required on pretty much all public forums. This excerpt from the rules of /r/facepalm lays it out very clearly:
When submitting screenshots remove profile pictures, all names, locations, usernames, and other personally identifiable information, including your own. And finally you’ll need to upload the anonymized image on a public image hosting site like imgur.com.
These steps might seem a bit daunting at first but in this how-to tutorial we’ll explain it simple steps that make it easy as pie.
Methods
There are a few different methods for preparing your Facebook screenshots. Check each of them out and then pick the one that’s easiest for you.
Using ThreadShots
ThreadShots is a tool that automates all of the steps necessary to share an anonymized Facebook post on Reddit, Twitter, or any other site. It easily handles posts that extend below the bottom of the screen and it redacts the personal information for you. The only downside of this method is that it’s currently only for people who use Google’s awesome Chrome browser. It will be available for Firefox soon so keep on eye on the ThreadShots homepage for updates.
-
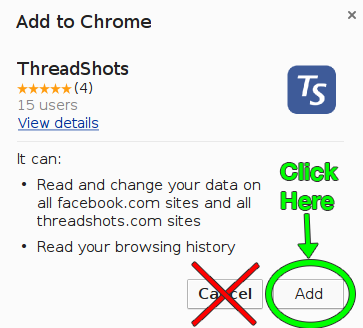
Click here to setup ThreadShots in your browser. When the popup below comes up you should press “add.”
-
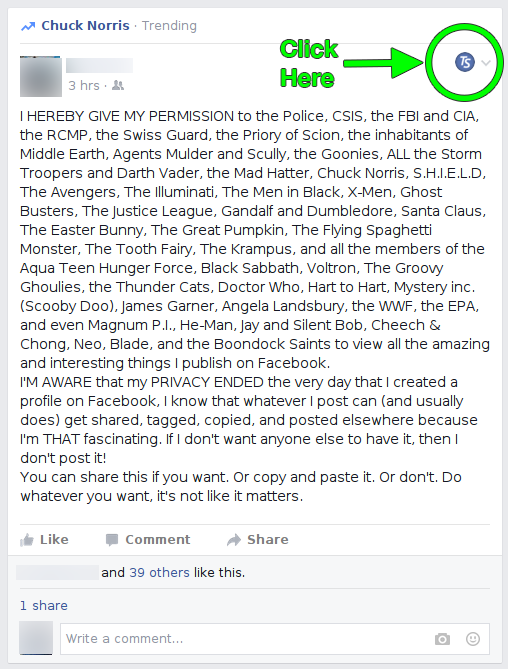
Navigate to facebook and find the post you want to share. Click on the small TS button in the upper right corner to take your screenshot or “threadshot.”
-
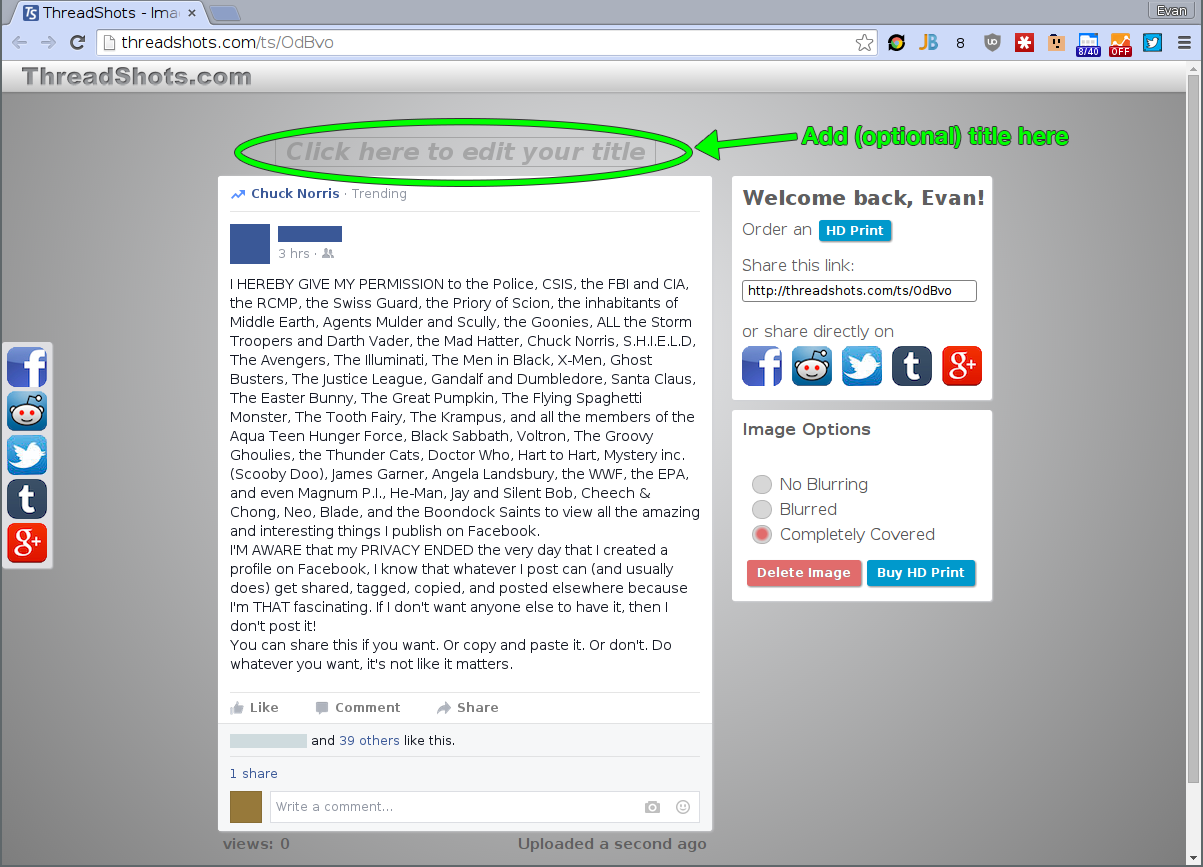
(Optional) Click on “Edit your title” and type in what you want the title to be when you share it.
-
And you’re done! Click on one of the Facebook, Reddit, Tumblr, g+, or Twitter share icons and a window will pop up to share on those websites.
Manually with Gimp
There are a number of tutorials around the web on taking screenshots using various keyboard shortcuts or pieces of stoftware like Snappy, Lightshot, Greenshot, or any one of a million others. The issue with a lot of these instructions is that if you’re not using the right operating system then they just won’t work. In this section of the tutorial we’ll give you instructions that work perfectly on Windows, OS X, and Linux, regardless of whether you’re using Windows XP, Windows Vista, Windows 7, Windows 8, Windows 10, OS X Lion, OS X Mountain Lion, OS X Mavericks, OS X Yosemite, OS X El Capitan, Ubuntu, Arch Linux, or any other variant.
-
Go to www.gimp.org/downloads/ and download and install Gimp. The instructions on that page will be automatically tailored to your operating system. Gimp is a free piece of image editing software that is similar to Photoshop.
-
Navigate to facebook and find the post you want to share. You need to be able to fit the entire post onto the screen in order to take a screenshot. If you can’t fit the entire post onto the screen then you’ll need to use the ThreadShot method instead.

-
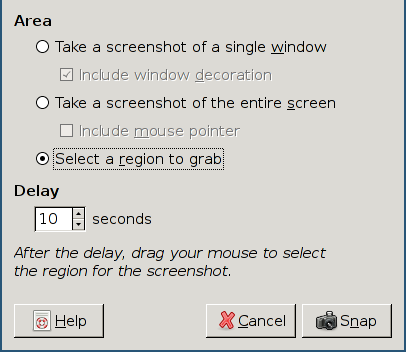
Launch the GIMP application and in the top menu go to File -> Create -> Screenshot .
-
A dialog window will open where you can select some options for your screenshot. You want to select “Select a region to grab” and you want to specify a delay of at least a few seconds because you’re going to need to switch back to the window with Facebook in it before you take the screenshot.
-
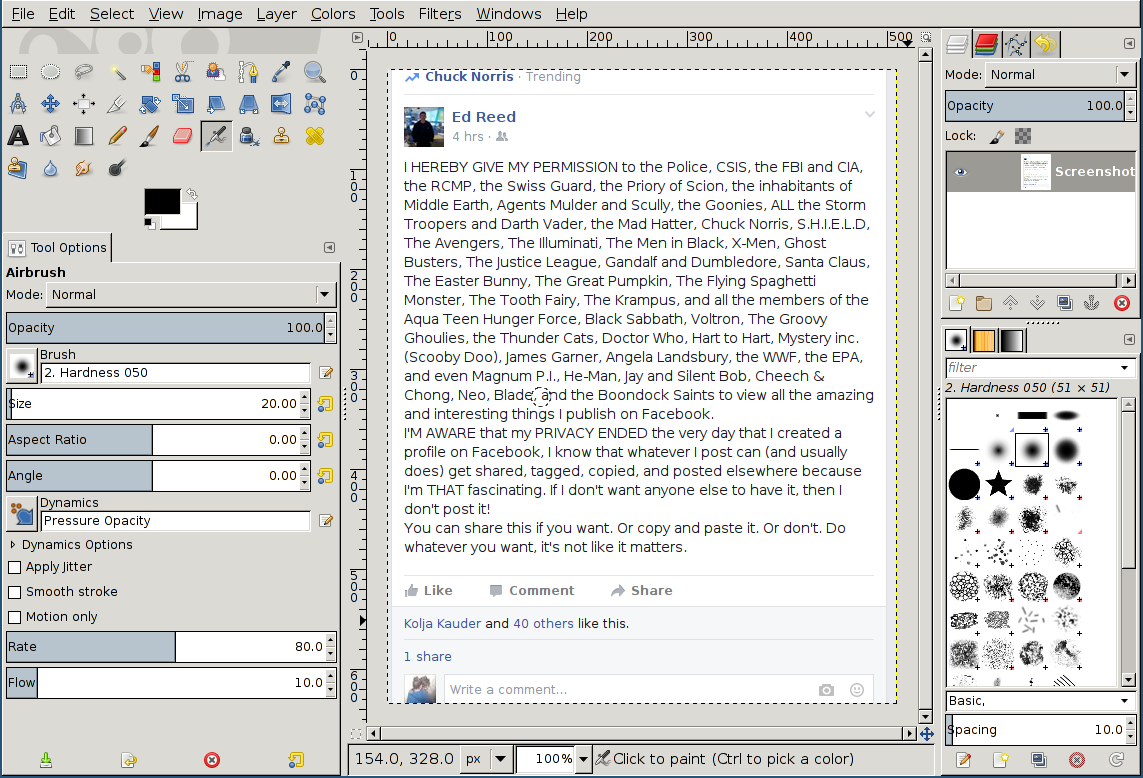
Switch back to the window with the Facebook post fully visible and wait for the cursor to turn into a cross. Now click at the upper left corner of the post and drag down to the lower right corner of the post. When you do this a window will open in Gimp with your screenshot.
-
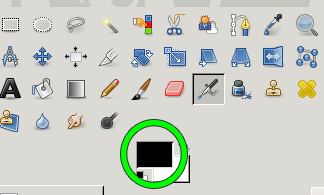
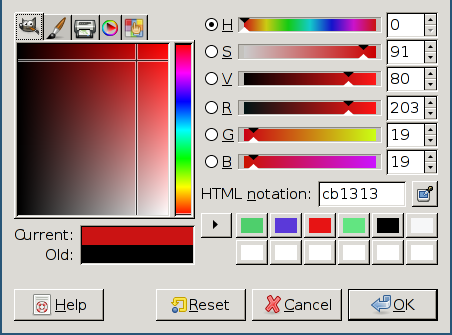
Now to redact the personal information you’ll need to change the color and paint over everything that you need to hide. Click on the foreground rectangle (the one that’s on top) in the Gimp toolbar to open the color selector.
-
Once you’re in the color selector you can click on any color to use it for the redacting of personal information. Click OK once you’ve made your selection.
-
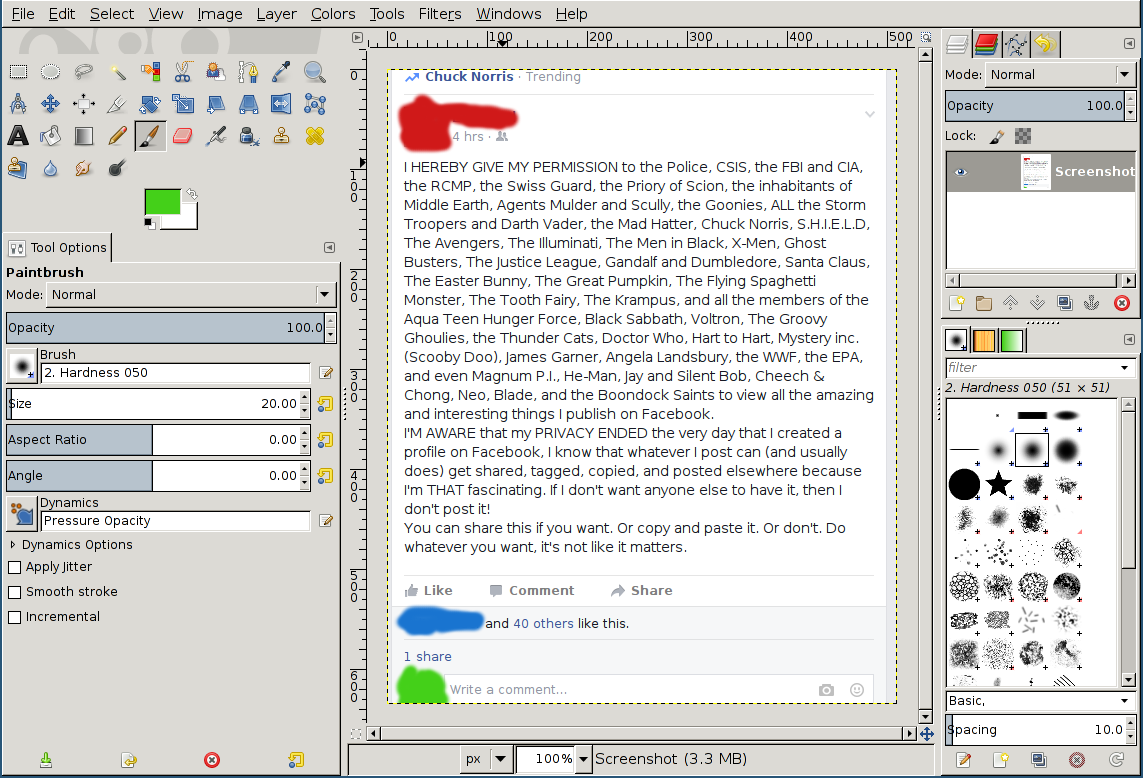
Now you’ll need to select the paint tool from the toolbar. It looks like a paint brush. Try your best to be neat here so the color bars look nice in the final image that you’ll share.

-
Now paint over all of the personal information for a single person.
-
Repeat steps 6-9 once for each person mentioned in the post. This can be time consuming but at the end you’ll have an image that’s properly anonymized.
-
Now select File->Export As to save the file. Select a location where you know you’ll be able to find the image later and give it a .png extension for maximum image quality. Click Export and then when another window pops up hit export again. The default settings are fine.
-
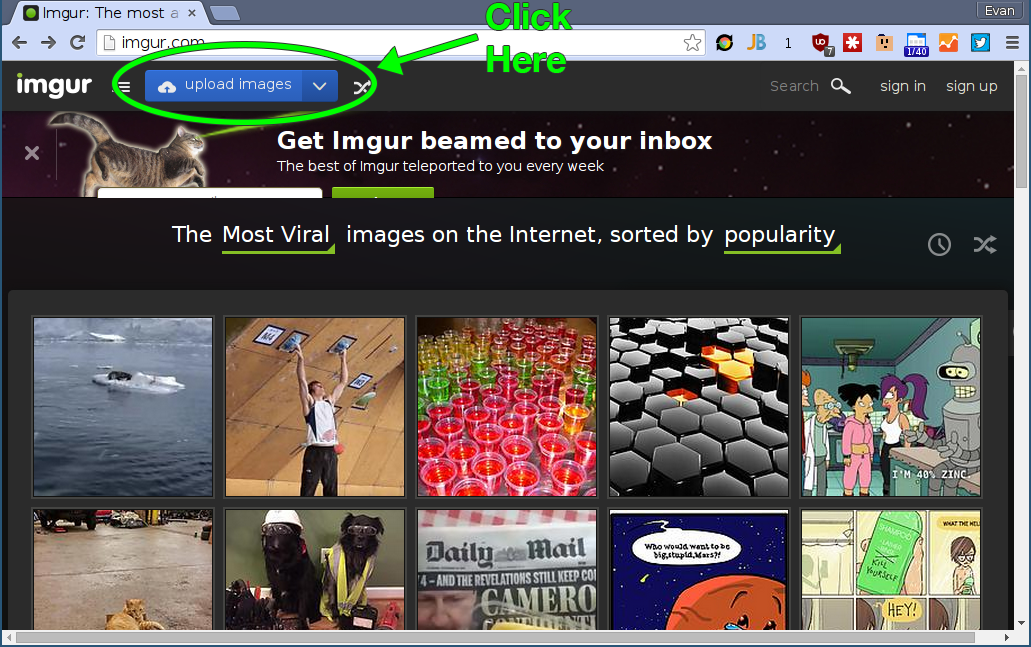
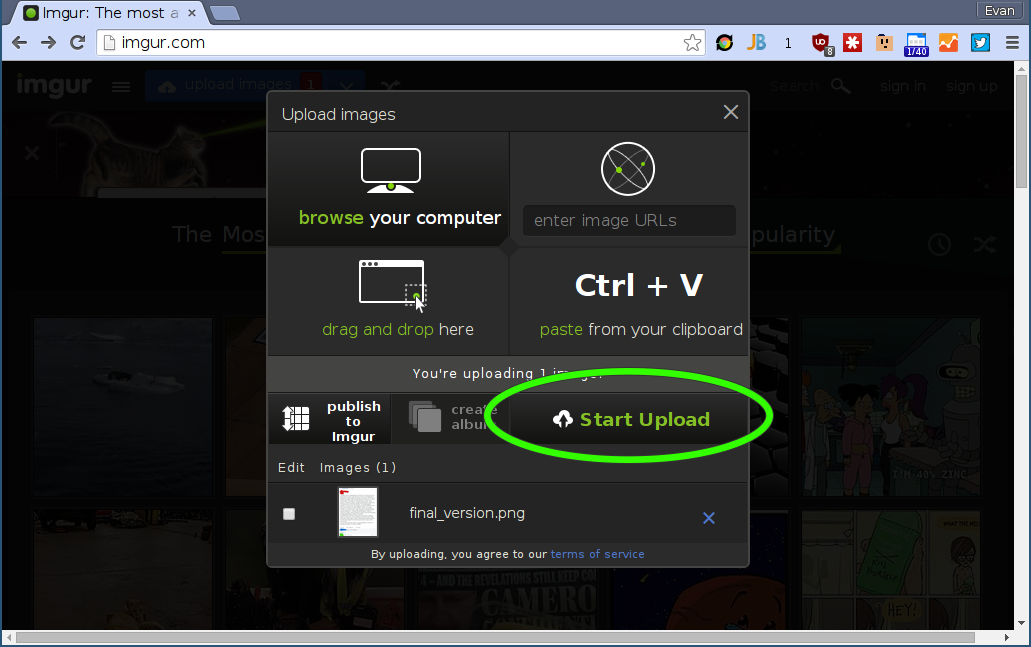
Now you need to upload the image somewhere on the internet if you want to share it. One good option is imgur.com. Navigate to imgur and click on “upload images”
-
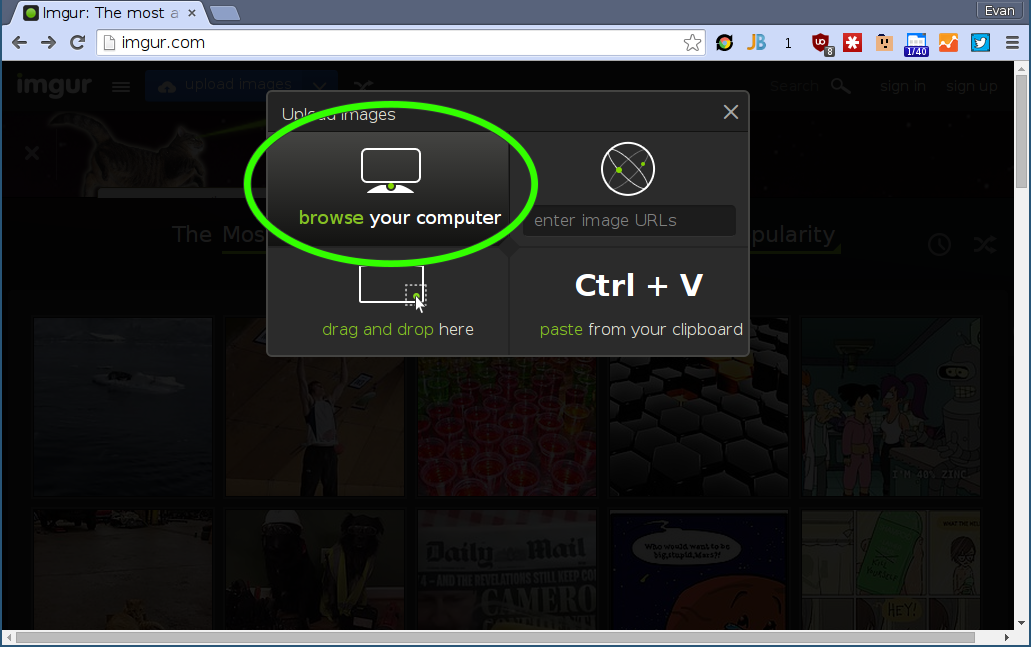
Click on “browser your computer”
-
In the file browser that comes up navigate to where you saved the file and click “Open”
-
Finally, click “Start Upload” and wait for the upload to complete.
-
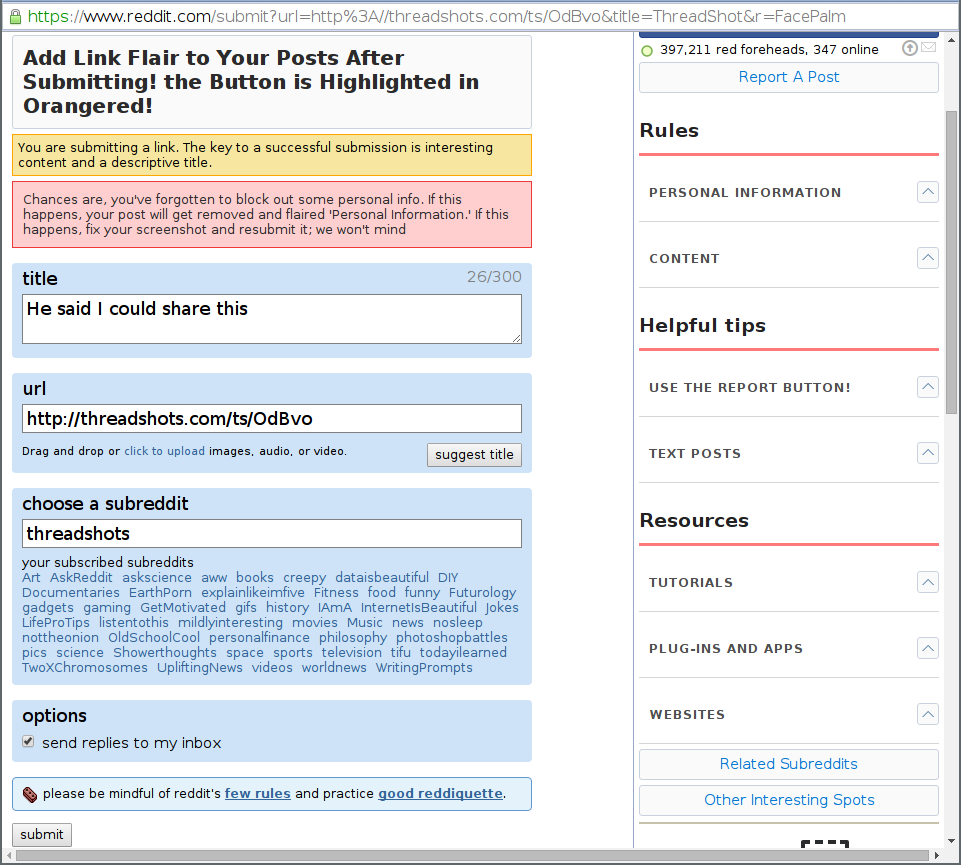
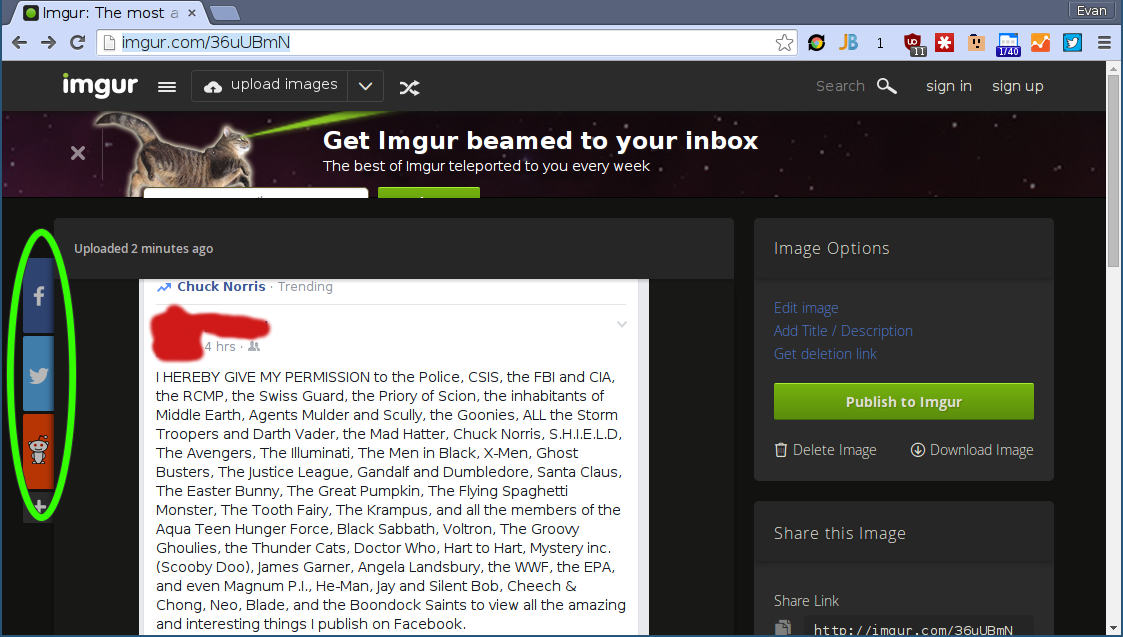
Click on the Reddit share button to the left of the image or any of the other share buttons.
-
Fill out the information in the new Reddit window that opens and press submit!
